Look stylish on-the-go with this easy stenciled farmhouse tote bag!
The farmhouse trend has been around for quite some time. The modern farmhouse look is rustic yet chic, contemporary yet country. It takes the best of the old style with a bit of a modern twist. I’m going to show you how to create your own farmhouse canvas tote bag using a stencil. Stencils make customization so easy since all you need to do is choose your favorite color palette and fill in the stencil design. This easy stenciled farmhouse tote bag is great for weekend trips to the farmer’s market, the grocery store, or as your go-to carryall.
Check out the full tutorial below to see how easy it is to make your own stenciled farmhouse canvas tote bag!
Supplies:
-Tote Bag Factory Carry-All Large Canvas Tote Bag
-Fabric Paint (Yellow, Black, and Turquoise)
-Lemon Farmhouse Stencil (I purchased mine from Amazon)
-Removeable Spray Adhesive (or Stencil Adhesive)
-Stencil Paint Brush
-Cardstock
-Painter’s Tape
Step 1: To get started you’ll need fabric paint. This will allow you to wash your canvas tote bag if it gets soiled or stained. If you don’t plan on washing your tote bag, you can use regular acrylic paint and use the method for manually washing your bag. If you can’t find paint color in your preferred choice, you can turn acrylic paint into fabric by using a fabric medium. To use the fabric medium, you simply mix 1 part fabric medium with 2 parts acrylic paint.

Step 2: Place a sheet of paper or cardboard inside of your tote bag. This will help prevent any paint from seeping through to the other side of the bag.
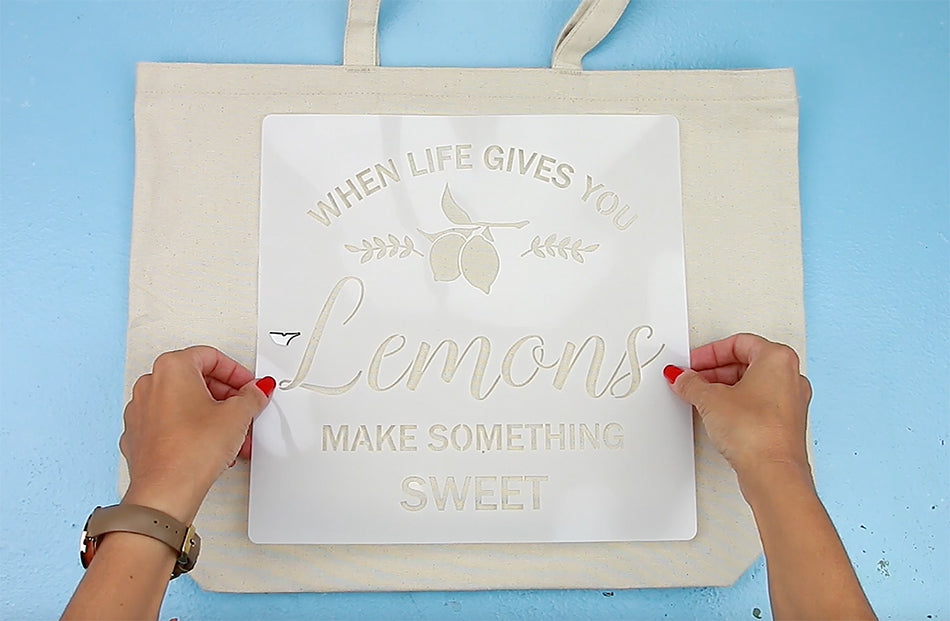
Step 3: To make your stencil stay in place while adding paint, it’s always a good idea to add an adhesive to the back. This also helps reduce paint seeping under the stencil and keeps smaller stencil pieces in place when you go over them with a paint brush. To add adhesive to your stencil, you’ll to make sure you have paper or some other option for protecting your surface (you can also go outside for this step). Flip your stencil over and lightly spray the back with sweeping motions to add a light layer of adhesive. Be sure to really get the small stencil pieces. If you don’t have adhesive spray for stencils, you can always tack it down using painter’s tape. Just be sure to tape down all four sides to ensure it stays in one place.

Step 4: Start by adding black paint to the phrase at the top of the stencil. For proper paint application, add a small amount of paint to your stencil brush. Lightly swirl it on your protective surface to remove any excess paint. Then, start on the plastic part of the stencil and move towards to opening of the stencil to add paint. This motion will help reduce excess paint from seeping under the stencil. The goal is to add a light layer of paint and then gradually add more if you need it. The last thing you want to do is have paint seep under your stencil ruining your design and your tote bag! Continue adding black paint until the top phrase has been painted. Then, add black paint to the word “Lemons”.

Step 5: Since the lemon design has two areas that need painted, it will need to taped off so paint doesn’t get where it’s not supposed to. Rip off small pieces of painter’s tape and cover all of the leaves and stems on the lemon. Be sure not to get any paint on the actual lemon–if you do, you won’t get paint on that area. Once everything is taped off, begin adding yellow paint to the lemons. Also add yellow paint to the letters below “Lemons”.

Step 6: Add some turquoise paint to your stencil brush and add it the bottom letters.

Step 7: Now that the paint on the lemons is dry, remove the painter’s tape. Just to be sure the lemons are completely dry, tap your finger on top. If any paint comes up, you’ll need to wait a bit longer to ensure it’s completely dry. Once it’s dry, you’ll cover the lemons with painter’s tape. Use the same process as the leaves and stems by ripping small pieces of tape to cover just the lemon designs. After they are completely covered, go ahead and add green paint to the leaves and stems. When you’re finished, remove the painter’s tape and let the paint dry.

Step 8: Grab one side of the stencil and slowly remove the stencil.

You are now left with a trendy farmhouse canvas tote bag! Pairing stencils with tote bags is such a fun way to customize and personalize them. There are so many stencils on the market at places like craft stores and online. You can really let your creativity run wild!

