It never fails, when it’s time to leave the house my 4-year-old daughter always has an armful of special items she wants to bring with her in the car. It’s like the minute she hears we are leaving she runs around the house collecting anything and everything she can find to make the trip with us.
What usually happens is I have her leave some of the items behind since there are only so many things a 4-year-old needs in the car, but inevitably my daughter has stuff in her hands and I have stuff in my hands. So, I thought a great workaround would be to make her a tote specifically for the car. A canvas tote bag that could hold her books, toys, snacks, and water bottle. I didn’t want it to be just any plain tote bag, but one that felt special, so I decided to create my own DIY version!
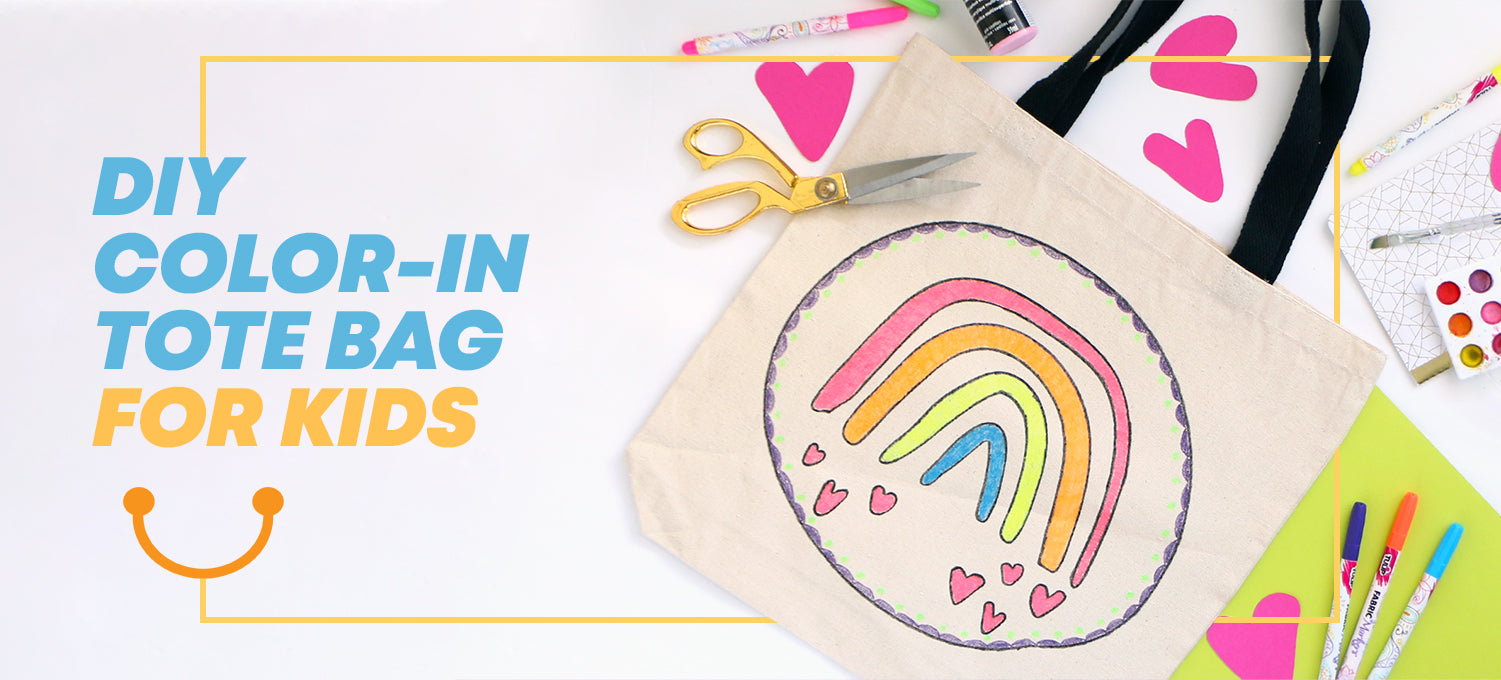
When it comes to decorating canvas tote bags it’s always fun to add a custom touch. Some people choose to add paint, while iron-on vinyl is also a popular option. But, for this tote bag I wanted something different. Something more interactive. So, I created a DIY color-in canvas tote bag that my daughter could customize and color-in herself. Since she is currently obsessed with markers and coloring, she LOVED this idea! It’s so fun that she gets to carry all of her favorite things a custom tote bag she created herself with markers!
Check out the full tutorial below to see how easy it is to make your own DIY color-in canvas tote bag!
Supplies:
- Canvas Tote Bag With Colored Handles
- Adhesive Vinyl
- Transfer Tape
- Electronic Cutting Machine
- Cutting mat
- Weeding Tool
- Scraper or Credit Card
- Scissors
- Black Fabric Marker
- Colored Fabric Markers
Step 1: Choose the design you would like to use as a stencil for your canvas tote bag. I went with a rainbow heart design, but you can choose whatever design you’d like. Once you land on a design, upload it to the design software for your electronic cutting machine. Resize the image until it’s large enough for your tote bag. If you don’t have an electric cutting machine, you can always purchase a stencil design online or from a craft store.
Step 2: Cut out the design on your electric cutting machine. Use a weeding tool to pull up the actual design from the vinyl, leaving the negative attached to the liner. This is what you’ll use as your stencil.
Step 2: Cut a piece of transfer tape a bit larger than your design. Place the tape over the design and use either a scrapper or credit card over the transfer tape.
Step 3: Slowly peel up the transfer tape at an angle. If you see some of your vinyl is not sticking to the tape, lay it back down and rub over it again until it gets picked up by the transfer tape. Continue peeling up the transfer tape until the entire design has been removed from the liner.
Step 4: Lay the vinyl stencil on the front center of the canvas tote bag. Once again, use a scrapper or credit card over the transfer tape. Slowly peel up the transfer tape at an angle. If you see some of your vinyl is not sticking to the canvas tote bag, lay it back down and rub over it again until it stays in place on the bag.
Step 5: Grab the black fabric marker and begin tracing around the design. This is what will create the blank “coloring book” on the tote.*
Step 6: When you’re finished tracing the outlines for the design, it’s ready to be colored and customized with primary, bold, pastel, and/or neon fabric markers!*

It really is easy to create a one-of-a-kind canvas tote bag. I just love the idea of creating a DIY color-in canvas tote bag that allows kids to custom their bag, but also becomes walking art and something special for them to carry around with all of their favorite things. This DIY color-in canvas tote bag would also make a great birthday gift idea for kids to promote creativity!
*FabricMate and Tulip Fabric Markers are both washable and do not require heat setting. Be sure to check the instructions on the package of the fabric markers used to ensure proper adhesion when laundering.

